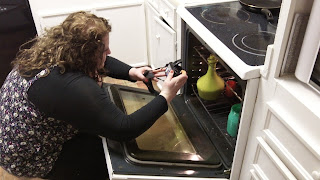
A vision of beauty.
I love these things! Kev brought a few boxes of them homes to me from an old house they were refinishing. Believe me, this is a better gift to me than a pair of nice earrings or a bouquet of flowers! Not only are Mason jars nice accents to my house as is, they have so many uses! You can re-purpose this heck out of em!
Here's a link with a bunch of ideas : What can I do with all these mason jars?
Here's a link with a bunch of ideas : What can I do with all these mason jars?
Besides simply setting them on random shelves and tabletops around my house,
Dying Jars!
My friend Kandess and I dyed the inside of jars to add a splash of colour to our homes with only a few simple ingredients!
1)food colouring
2)mod podge
3)an oven
We just took a clean, dry jar and squirted a tablespoon or two of mod podge into the jar along with a few drops of your food colouring of choice. We swirled it around in the jar until with some covered and disposed of the rest. We simply 'baked' them in the oven until they were dry ( were clear and colourful!)
And TADA! Pretty jars for all!!
We put the colouring mixture INSIDE of the jars, however, if you want to put candles and whatnot inside of them, you can paint the mixture on the outside of them. This colouring is NOT permanent, and I don't know what the heat of a candle will do to the inside if burned too long!
That being said, here is a list of slight mishaps and lessons we learned...
Mishap #1
There is absolutely NO NEED to put half a bottle of food colouring in a bottle, no matter how rich of a colour you want you bottle to be!
It's hard to tell exactly what colour your final product will be without some trail and error. Just keep in mind that the mod podge is WHITE before it dries, so the dye you mix it with will appear very light and pastel until it dries. A couple of drops is PLENTY! If you put too much your bottle will be super dark and not clear anymore! I made what i thought would be a beautiful purple bottle.. but once it dried, the finished product with BLACK!
Luckily, if you make a mistake...this colouring is not completely permanent! You can wash the colour out with warm, soapy water and start again!
Mishap #2
Baking them in your oven takes A LONG TIME! Which is not big deal... until the stench hits you! We had, about a billion bottles drying at one time, so the smell of all of that mod podge got to be a little much. They dry just as easily outside on a hot sunny day... it just may take a bit longer than in the oven!
Picture frames!
EASY! pick our bottles you like and display them upside down or right side up with photos inside of them!
I could have used a lot nicer bottles.. these are run of the mill walmart ones... but you get the idea!
Candle Holders!
Throw a tea light in a few of them and set them around either inside or outside your house! Easy Peasy, lemon squeezy!
Storage!
We use them around the house to store tea bags, spices, herbs, grains, left overs, bouquets of flowers, anything in.
Kevin used them in his workshop to store nails, screws and all that stuff in. He has nailed a bunch of lids under a shelf and just screws that jars on and off as he needs each item. They are see through, not cluttering his work bench and keep things neat and organized.
ANYWAY... the link above shows a whole bunch of uses... I don't suggest you necessarily need to go overboard like my family... but hey... they are easy to come buy at a good price and add a little 'rustic' chic look to the house!
Let me know what fun ideas you come up with!


No comments:
Post a Comment